3. User Interface
PyAero comes with a graphical user interface (GUI) written in Qt for Python aka Pyside6.
3.1. Overview
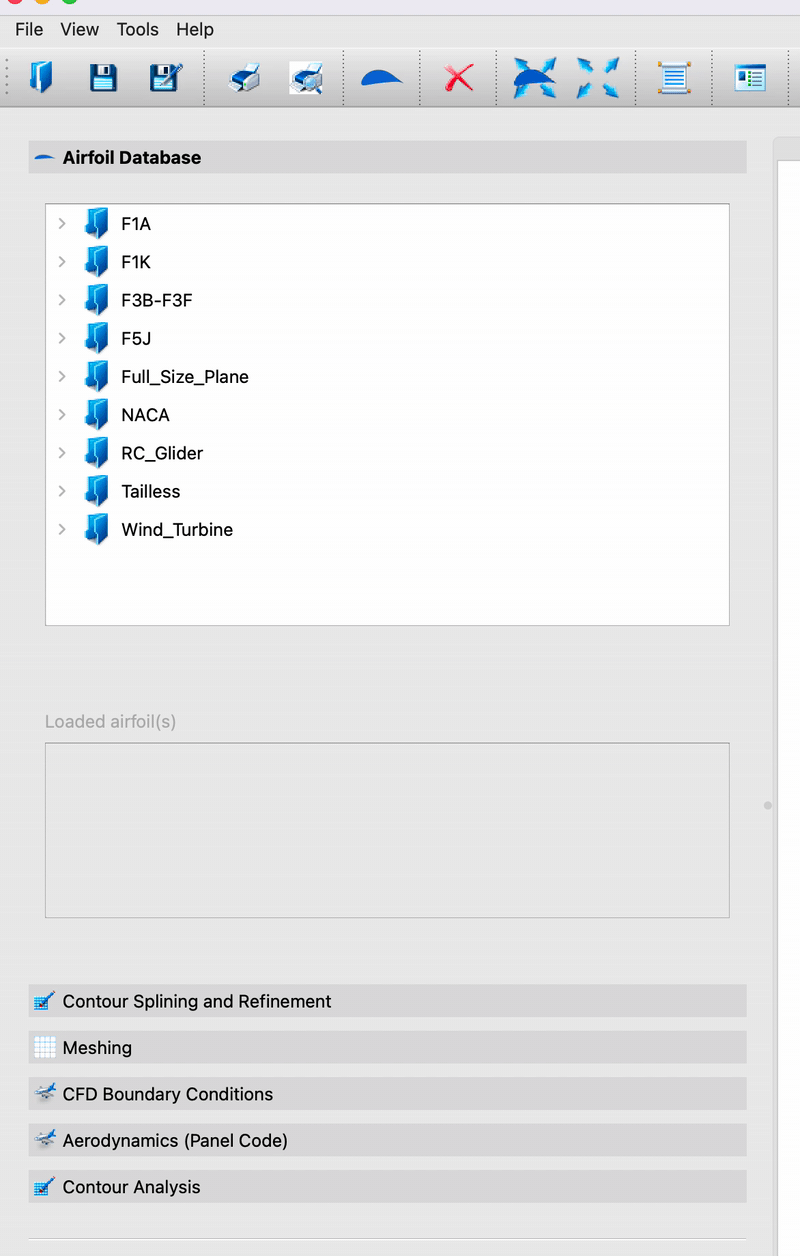
The layout of the user interface can be seen in the figure below. Different functional areas are bordered with blue lines. These areas are:
- Menubar
- Toolbar
- Toolbox
- Graphics view
- Viewing options
- Message window
Loading and saving geometry and meshes is done via the menus and the toolbar. Most operations during geometry preparation and meshing are done inside the toolbox.
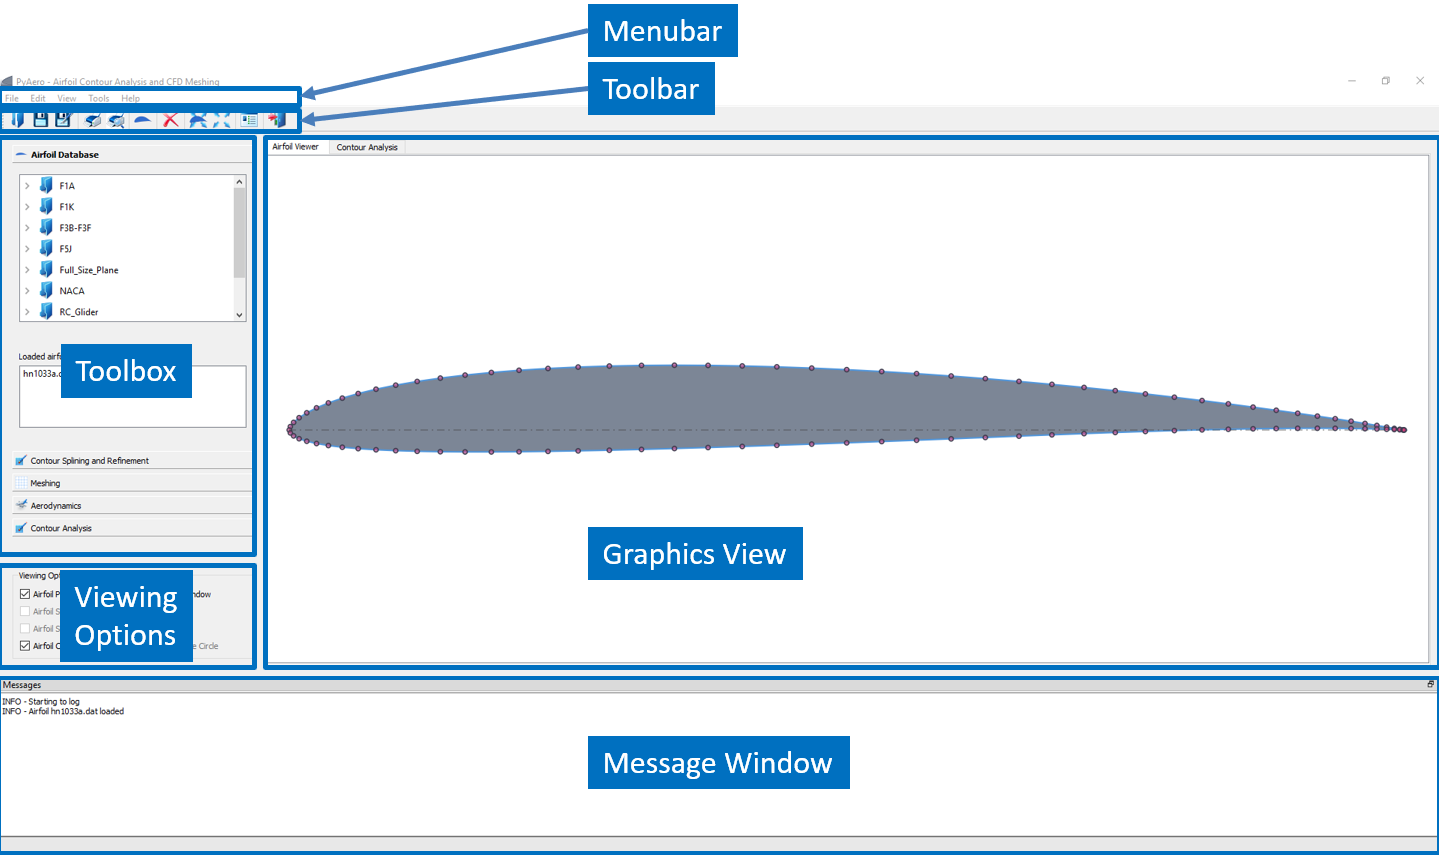
Graphical user interface of PyAero
3.2. Menus
Menus in PyAero try to behave much the same as in typical desktop software. For standard menus as File or Print the documentation will be kept short. See figure above for the location of the menubar in the GUI and the figure below for an overview of the menu structure.
The menus in the menubar and the tools in the toolbar (see Toolbar) are coded in a dynamic way. That is, all menus and toolbar items (and their respective handlers/callbacks) are read from XML files (see PMenu.xml, PToolbar.xml in the data/Menus folder of the installation). The graphical user interface is automatically populated using the entries of those files. With this structure in place, menus and toolbar items can easily be extended and customized. When adding new menus and thus functionality, it is required to provide corresponding functions in the code or handlers (in Qt for Python nomenclature so-called “slots”) to take care of the newly introduced functionality.
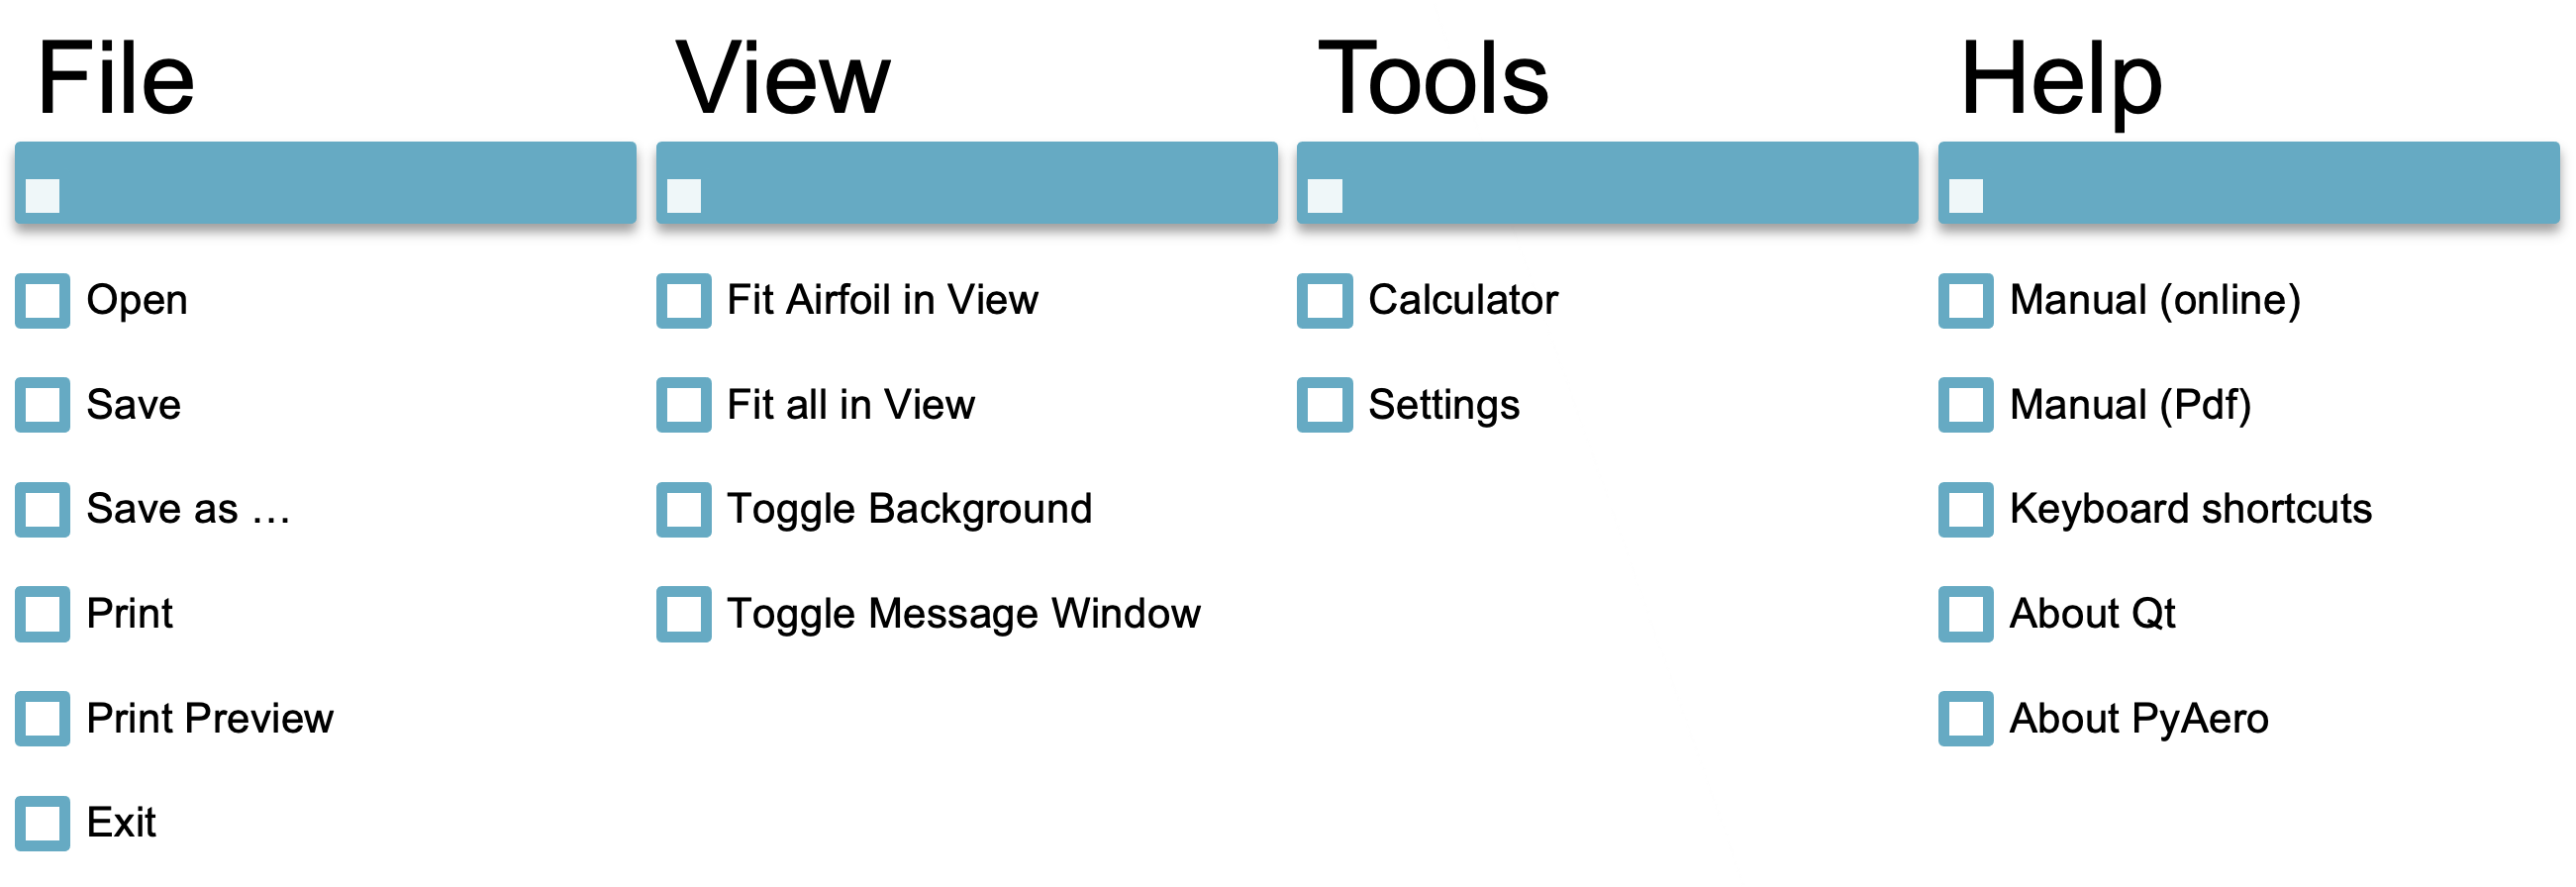
PyAero menu structure
Note
Most probably, the XML files will be changed to JSON format sooner or later. This will not change the functionality.
3.2.1. Menu File
This menu is, as pointed out before, a typical desktop software menu. It consists of a set of dialogs for file manipulation, printing and alike.
3.2.1.1. Submenu Open
The submenu is used to load airfoil contour files or meshes.
At the moment the standard file format as used in many applications is supported.
“Coordinates in the standard format wrapping from upper surface trailing edge around the leading edge to the lower surface trailing edge”
See figure below for the layout/format of such a file. Only the first and last few lines of the file are printed here.
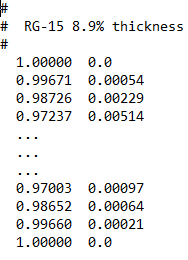
Typical format of an airfoil contour file
This format is often used in software like XFOIL and similar.
In addition, lines starting with a hash sign # at the beginning are interpreted as comment lines
(i.e. not used inside PyAero). This can be used for documentation or to add additional information.
3.2.1.4. Subenu Print preview
The submenu allows previewing the printout prior to printing. Actual printing then can be started directly from the print preview dialog, see Figure 2 3.
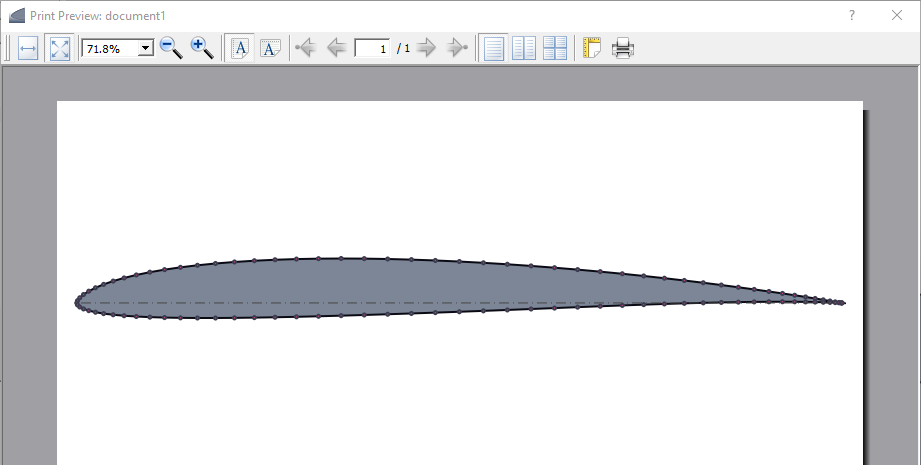
Print preview dialog
3.3. Toolbar
The toolbar in PyAero allows fast access to actions which are otherwise triggered by menus. Each of the toolbar buttons launch a specific action. The toolbar can be customized by editing the file $PYAEROPATH/data/PToolBar.xml.

Overview on toolbar options
3.4. Toolbox Functions
The toolbox functions are arranged at the left border of the GUI. A toolbox is a GUI element that displays a column of tabs one above the other, with the current item displayed below the current tab. The toolbox is the main working area when generating meshes with PyAero. The complete functionality like splining, refining, contour analysis and meshing are operated there. See the animation below to get an overview on the options available in the toolbox.
Overview on toolbox options
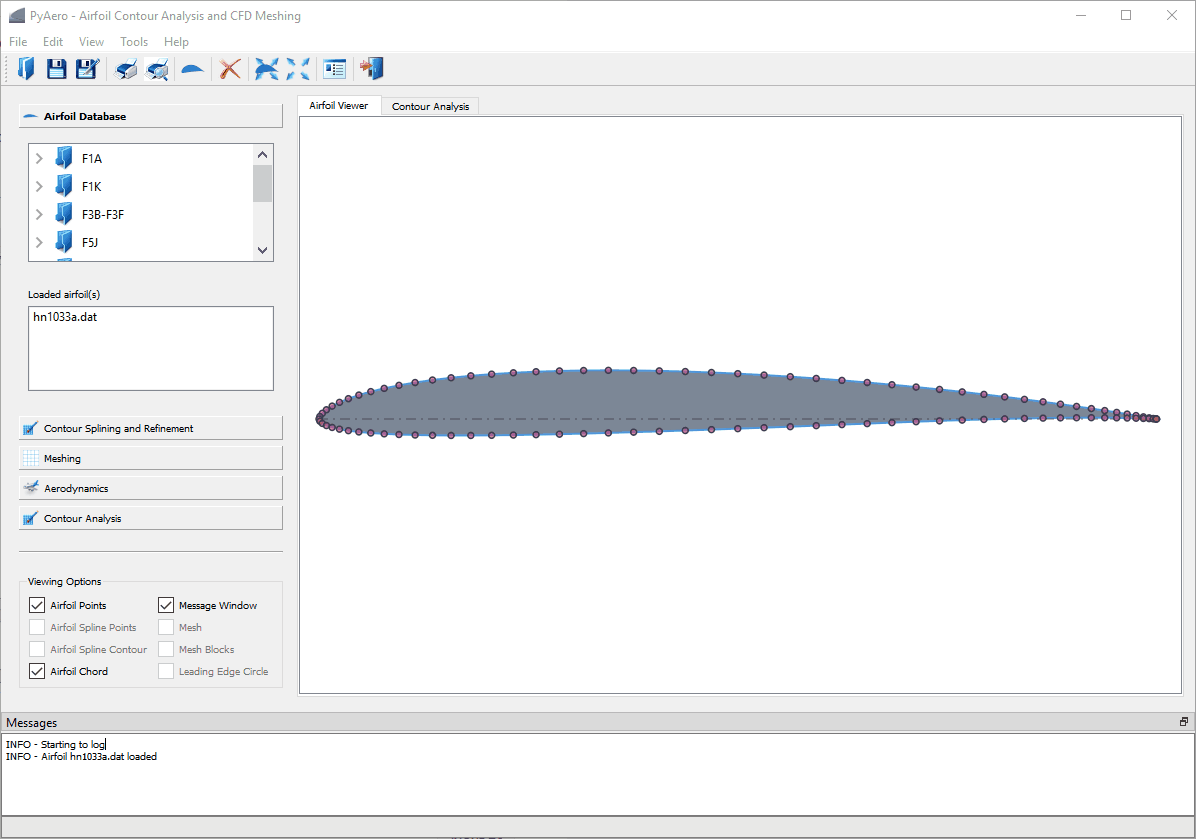
3.5. Tabbed Views
The graphics view in PyAero and a set of other views (see figure below) are arranged via a tab bar. E.g., the views can be switched between the graphics view and the contour analysis view. The latter contains graphs for curvature analysis.
Overview on tabbed views
Note
The look and feel of the tabs might change over time.
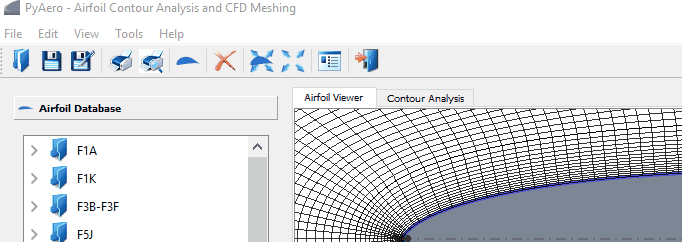
3.6. Zooming, Panning
When an airfoil is loaded it is displayed with a size that fits into the graphics view (leaving a small margin left and right). The contour can then be panned and zoomed in the following way:
3.6.1. Panning
In order to pan (drag) the contour or any other item press and hold CTRL (CMD on MacOS) and then press and hold the left mouse button and move the mouse in order to drag the contour.

Drag the items in the view by pressing CTRL and moving the mouse (left button pressed)
3.6.2. Zooming
Zooming is activated by pressing and holding the left mouse button. While dragging the mouse, a rubberband rectangle is drawn. This rectangle indicates the area which will be zoomed when releasing the left mouse button. In order to avoid accidential zooming too deep, a minimum size rectangle has to show up. A valid zoom rectangle is indicated by changing its background to a transparent blueish color (the minimum allowed size can be set in Settings.py by changing the value of RUBBERBANDSIZE). In order to zoom in deeper, the rubberband rectangle can be subsequently used.
Zoom limits (MINZOOM, MAXZOOM) are set in the file Settings.py.
Zoom the items in the view. Select a rectangle using the left mouse button.
Another natural possibility to zoom the view, is to use the scroll wheel. Thereby the geometry is zoomed with respect to the current mouse position.
Zooming can further be done using the Page-Up and Page-Up down keys.
A reset to the initial (home) position can either be achieved by pressing the HOME key or by right clicking in the graphics view and selecting Fit airfoil in view from the pulldown menu.
3.7. Keyboard shortcuts
To speed up some operations, a set of keyboard shortcuts are defined. In some of the menus the shortcuts for the respective actions are defined at the right side of the menu. Furthermore, the shortcut CTRL+k on Windows and CMD+k on MacOS are used to access an overview of the keyboard shortcuts.
Note
The keyboard shortcuts are rendered as uppercase letters in the GUI. Nevertheless, always lowercase letters need to be used, unless the SHIFT key is a part of the shortcut.